Preparing Cabinets for Painting: How To Clean Cabinets To Paint
You’ve decided to paint your cabinets, and that’s a great way to give your kitchen a fresh new look! Before you can start painting, you’ll need to prepare your cabinets properly. This involves emptying them, removing doors and drawers, cleaning them thoroughly, and removing any hardware.
Emptying and Removing Cabinet Contents, How to clean cabinets to paint
Emptying your cabinets is the first step in preparing them for painting. You’ll need to remove everything from inside, including food, dishes, and any other items you store in them. This is the perfect opportunity to declutter and organize your kitchen!
- Start with the upper cabinets. Remove all contents, and then carefully place them in a designated area, making sure they are protected from dust and debris.
- Move on to the lower cabinets. Do the same, removing all items and storing them safely.
- Remove all drawers. Empty each drawer, and then carefully set them aside.
Removing Cabinet Doors and Drawers
After you’ve emptied your cabinets, you’ll need to remove the doors and drawers. This will give you easier access to the surfaces you’ll be painting.
- Start by removing the hinges. Most hinges are held in place with screws. Use a screwdriver to remove them carefully, making sure not to damage the wood.
- Remove the doors. Once the hinges are removed, you can gently lift the doors off the cabinets.
- Remove the drawers. Most drawers are held in place with slides. Carefully remove the slides, and then lift the drawers out.
Cleaning Cabinet Interiors
Once the doors and drawers are removed, you can start cleaning the interiors of the cabinets. This is an important step to ensure that your paint will adhere properly.
- Remove any sticky residue. You can use a scraper or putty knife to remove any sticky residue left behind from labels or other items.
- Clean with a degreaser. Use a degreaser to remove any grease or grime. You can use a commercial degreaser or make your own by mixing equal parts white vinegar and water.
- Rinse and dry thoroughly. Rinse the cabinets thoroughly with water and then dry them completely with a clean cloth.
Removing Cabinet Hardware
Before you start painting, you’ll need to remove any hardware from your cabinets, such as knobs, pulls, and hinges. This will ensure that your paint job is smooth and even.
- Use a screwdriver to remove the hardware. Most hardware is held in place with screws. Use a screwdriver to remove the screws carefully, making sure not to damage the wood.
- Place the hardware in a safe place. Once the hardware is removed, place it in a safe place where it won’t get lost or damaged.
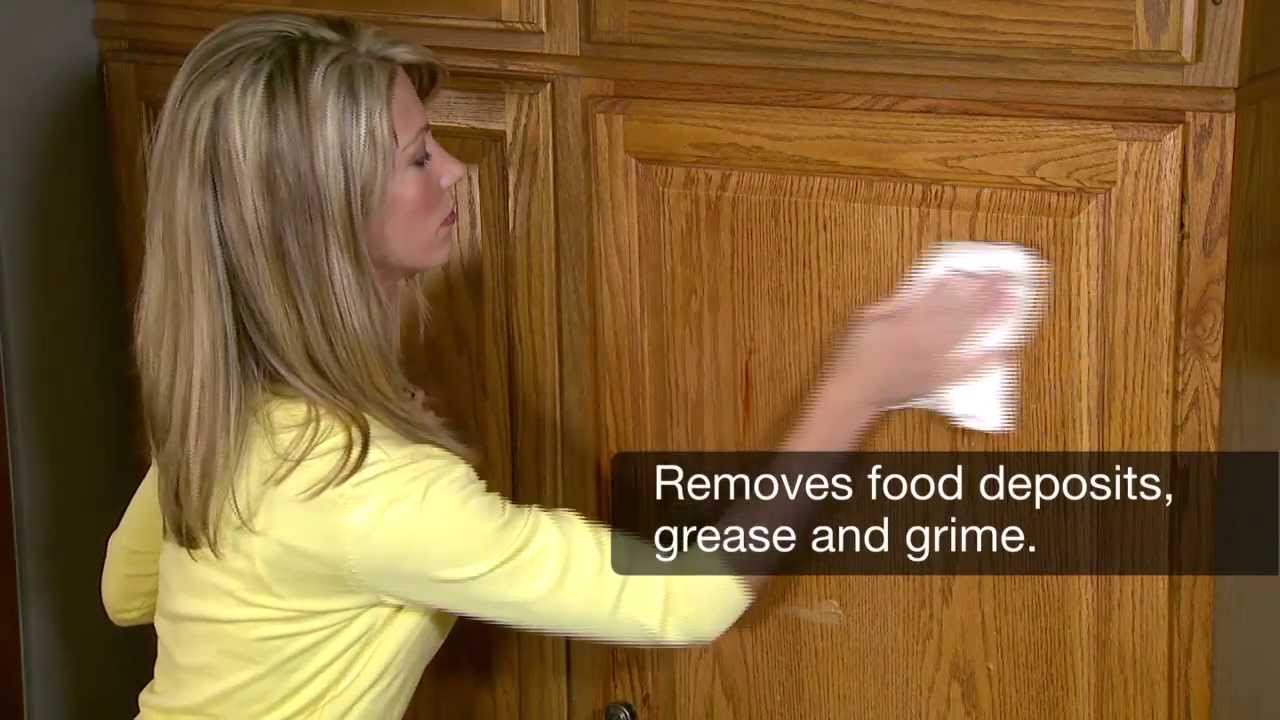
Cleaning Cabinet Surfaces

A thorough cleaning is crucial before painting your cabinets to ensure a smooth, even finish. This step removes dirt, grease, and old coatings, allowing the paint to adhere properly.
Cleaning Methods for Different Cabinet Materials
The cleaning method you choose depends on the type of cabinet surface. Here’s a breakdown of the best approaches for wood, laminate, and painted cabinets:
Wood Cabinets
Wood cabinets are susceptible to scratches and require gentle cleaning.
- Mild Detergent and Water: Mix a few drops of mild dish soap with warm water. Apply this solution to a soft cloth and gently wipe down the cabinet surfaces. Rinse with clean water and dry thoroughly with a soft towel.
- Mineral Spirits: For stubborn stains or grease, mineral spirits can be effective. Apply a small amount to a clean cloth and rub gently. Avoid prolonged contact with the wood, as it can dry out the surface. After cleaning, wipe down the area with a damp cloth and dry thoroughly.
Laminate Cabinets
Laminate cabinets are more durable than wood but still require careful cleaning.
- Warm Water and Dish Soap: A mild dish soap solution works well for everyday cleaning. Avoid abrasive cleaners or harsh chemicals that can damage the laminate surface.
- Baking Soda Paste: For tough stains, create a paste with baking soda and water. Apply this paste to the stain and let it sit for a few minutes. Gently scrub the area with a soft cloth and rinse with clean water.
Painted Cabinets
Painted cabinets require gentle cleaning to avoid damaging the existing paint.
- Warm Water and Dish Soap: A mild dish soap solution is generally sufficient for cleaning painted cabinets. Avoid abrasive cleaners or harsh chemicals that can strip the paint.
- Magic Eraser: For stubborn stains or scuff marks, a Magic Eraser can be helpful. Use it lightly, as it can be abrasive. Test it in an inconspicuous area first to ensure it doesn’t damage the paint.
Step-by-Step Guide for Cleaning Cabinets
Here’s a step-by-step guide for cleaning your cabinets before painting:
- Gather Supplies: You’ll need a cleaning solution (see table below), soft cloths, a scrub brush (optional), and a vacuum cleaner with a brush attachment.
- Remove Cabinet Doors and Hardware: Take off all cabinet doors and hardware, such as hinges and knobs. This allows for thorough cleaning and prevents damage to the paint during the cleaning process.
- Vacuum the Cabinets: Use the vacuum cleaner with a brush attachment to remove dust, cobwebs, and debris from the cabinet interiors and exteriors.
- Clean the Cabinet Surfaces: Apply the chosen cleaning solution to a soft cloth and gently wipe down all surfaces. For stubborn stains, use a scrub brush. Rinse the surfaces with clean water and dry thoroughly.
- Sand the Cabinets: Once the cabinets are completely dry, lightly sand them with fine-grit sandpaper (120-180 grit). This helps to create a smooth surface for the paint to adhere to. Sanding is especially important for painted cabinets, as it removes any imperfections or glossiness.
- Wipe Down the Cabinets: After sanding, wipe down the cabinets with a tack cloth to remove any dust or debris. This ensures a clean surface for painting.
Cleaning Solutions for Cabinet Materials
Here’s a table summarizing the best cleaning solutions for different cabinet materials:
| Cabinet Material | Cleaning Solution | Wood | Mild detergent and water, mineral spirits | Laminate | Warm water and dish soap, baking soda paste | Painted | Warm water and dish soap, Magic Eraser (use lightly) |
|---|
Painting Cabinets

Now that your cabinets are prepped and ready, it’s time to get those brushes moving! Painting cabinets can be a rewarding experience, transforming your kitchen or bathroom with a fresh new look. But before you dive in, there are a few important things to consider.
Choosing the Right Paint
The type of paint you choose will significantly impact the final look and durability of your cabinets.
- Type: Latex paint is the most popular choice for cabinets. It’s easy to clean up with soap and water, dries quickly, and comes in a wide variety of colors and finishes. Oil-based paint is more durable but requires mineral spirits for cleanup and has a longer drying time.
- Finish: The finish determines the sheen of the paint.
- Matte: Provides a flat, non-reflective finish that hides imperfections well.
- Eggshell: Offers a slightly more sheen than matte, making it easier to clean.
- Satin: A mid-sheen finish that’s durable and easy to clean, making it a popular choice for kitchens and bathrooms.
- Semi-gloss: A high-sheen finish that is very durable and easy to clean.
- Gloss: The highest sheen, providing a very durable and shiny finish.
- Color: Consider the overall style of your home and the color scheme of your kitchen or bathroom when choosing a color. White is a classic choice for cabinets, but you can also choose bold colors or even a two-tone design.
Applying Primer
Primer is essential for creating a smooth, even surface for the paint to adhere to. It helps to seal the wood and prevent the paint from soaking into the surface, which can lead to uneven coverage and a less durable finish.
- Types of Primer: There are several types of primer available, including oil-based, latex, and shellac. Choose a primer that’s compatible with the type of paint you’ll be using.
- Application: Apply the primer with a brush, roller, or spray gun. Use long, even strokes and avoid over-applying. Allow the primer to dry completely before moving on to the next step.
Achieving a Smooth and Even Finish
A smooth, even finish is essential for a professional look.
- Brushstrokes: Use long, even strokes when applying the paint. Avoid going over the same area multiple times, as this can lead to brush marks.
- Technique: For cabinets, it’s often best to use a brush for corners and edges and a roller for larger surfaces. You can also use a spray gun for a more even finish.
- Sanding: Lightly sand the paint between coats to smooth out any imperfections. Use fine-grit sandpaper (220-grit or higher) and sand lightly in the direction of the wood grain.
Applying Multiple Coats
Multiple coats of paint are essential for achieving a durable and even finish.
- Number of Coats: Most cabinets require two to three coats of paint.
- Drying Time: Allow each coat of paint to dry completely before applying the next. The drying time will vary depending on the type of paint and the humidity.
How to clean cabinets to paint – So, you’re ready to paint your kitchen cabinets? Awesome! First, you need to give them a good scrub. Don’t forget to tackle the hinges, too! You know, just like how you should make sure your bedroom door opens outward, because safety first, folks! Now, back to those cabinets.
Once they’re sparkling clean, you’re ready to unleash your inner artist and transform your kitchen!
Okay, so you’re prepping your cabinets for a fresh coat of paint, right? Maybe you’re going for a classic white, or maybe you’re feeling a little more adventurous and channeling that pink shabby chic bedroom vibe. Whatever your color scheme, remember, a good cleaning is key! No one wants their newly painted cabinets looking like they’ve been through a hurricane (unless that’s your aesthetic, in which case, more power to you!).

